![]()
![]()
![]()
![]()
![]()
![]()
![]()
![]()
![]()
![]()
|
|
|
|
Laser guided hollowing
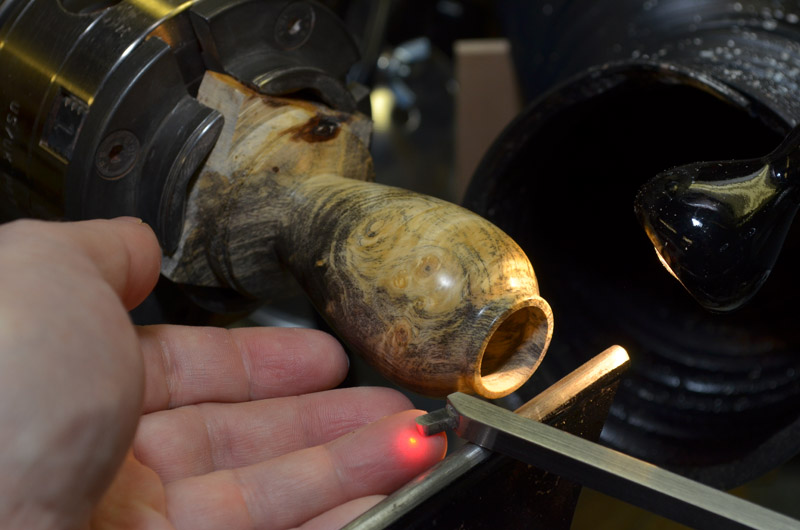
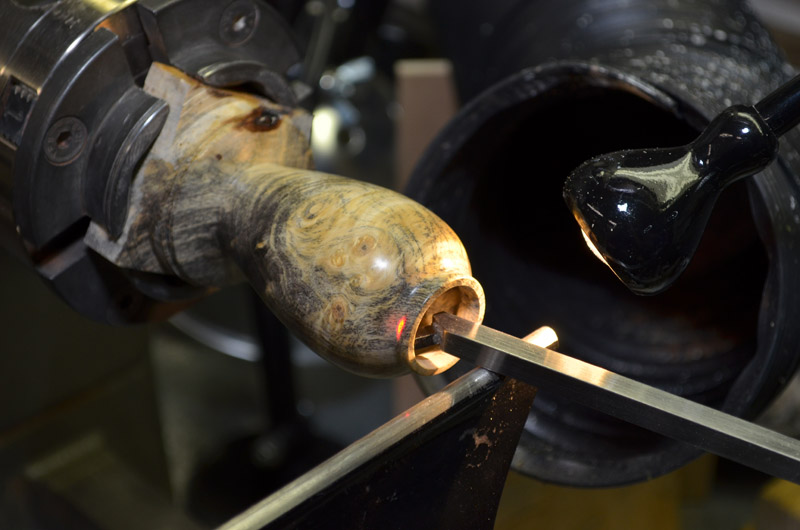
Click on the small photos for larger views For some time I was trying to decide whether to acquire a "captured" hollowing rig for my lathe. There's something to be said for totally hand held tools, but having done one or two, I was looking for a "guided" solution. There are many designs for these rigs. Some capture at the toolrest, some capture at the rear with a rectangular frame, and some have articulating arms. Even after deciding on a design, the next decision is build or buy. I decided to buy the Monster Lathe Tools articulated arm rig, that comes complete with a laser. Aside from that fact that I'm a laser-kind-of-guy, the laser gives a good indication of where the cutting bit it, and this is a fine thing considering you're cutting blind inside of the hollow form. Assembly of the Monster rig was simple, and the machining is first rate (though the base has kind of homely welds, but that's just cosmetic). A few weeks earlier I started a small buckeye burl hollow form using handheld Nano Revolution tools, but decided to put it aside and do the final hollowing when the Monster came in. So when the rig arrived I mounted the angled cutter from the Nano tool in place of the stock Monster cutters. Everything looks good, and of course my first hollowing attempt with the rig was be making the walls about 1/10" thick, so precision is the name of the game. I spoke to Randy Privett (at Monster Tools), as my first inclination for small projects like this is to use a shorter boring bar, which would move the articulated arm closer to the headstock and shorten the laser arm. I don't know if this would be a good tweak or not, but it was something to think about. He doesn't make shorter bars, but I figured that it wouldn't be a big deal for me to turn one on my mini-metal lathe. Also for small items, it might be useful to have something to more precisely position the laser. Perhaps something closer to the Don Derry laser mount that uses screws to move the light. So I'm play with the stock rig and see how it goes. So far, I'm having fun playing with the new toys. I'll make more photos of the stock Monster components soon.
First TweakOk, it's been a few days. Never one to leave well enough alone, I thought that for some pieces I might like a shorter boring bar than the 12" bar that comes standard with the Monster rig. I don't know if there is any real gain to shortening the bar, but for some small forms, it seems to be that there may be a benefit from having the articulating arm closer. This also shortens the extension necessary for the laser arm, which I'm thinking should reduce any flex... useful for very thin wall subjects (as mentioned, my first piece is using a NanoTools bit should have walls about 1/10" thick, so any precision/rigidity is welcome). Because Monster doesn't sell a shorter main boring bar, I thought about making one myself. Then while thinking about how I was going to do this, where I'd get the round bar stock from and how to turn it... I had an epiphany. I didn't need to create a shorter bar at all!
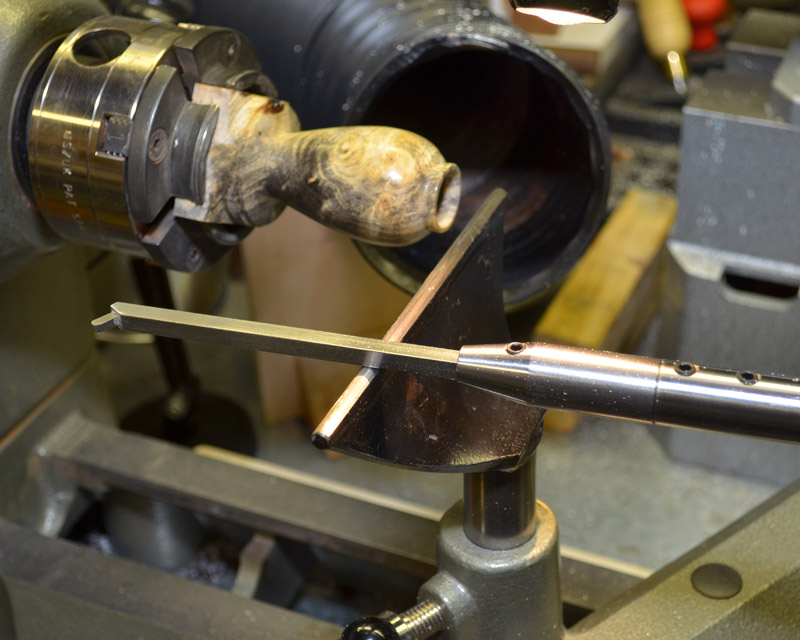
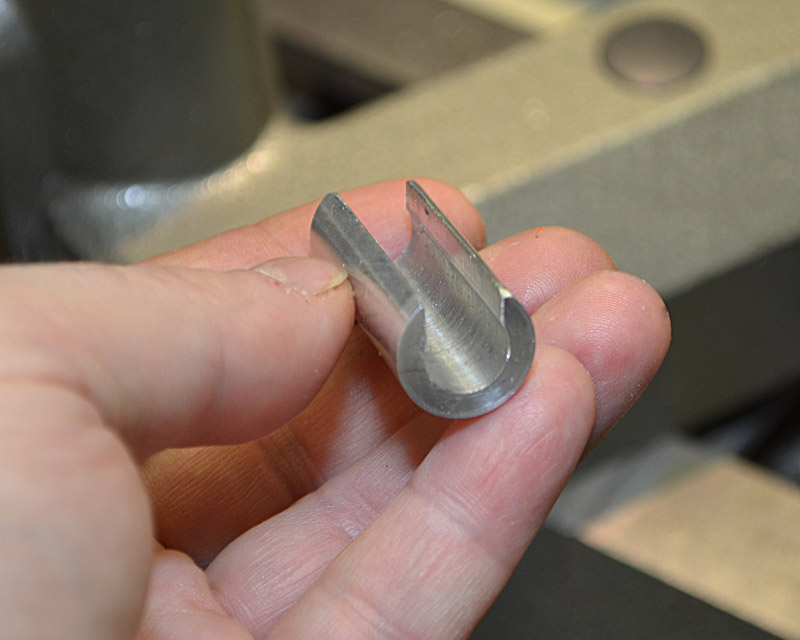
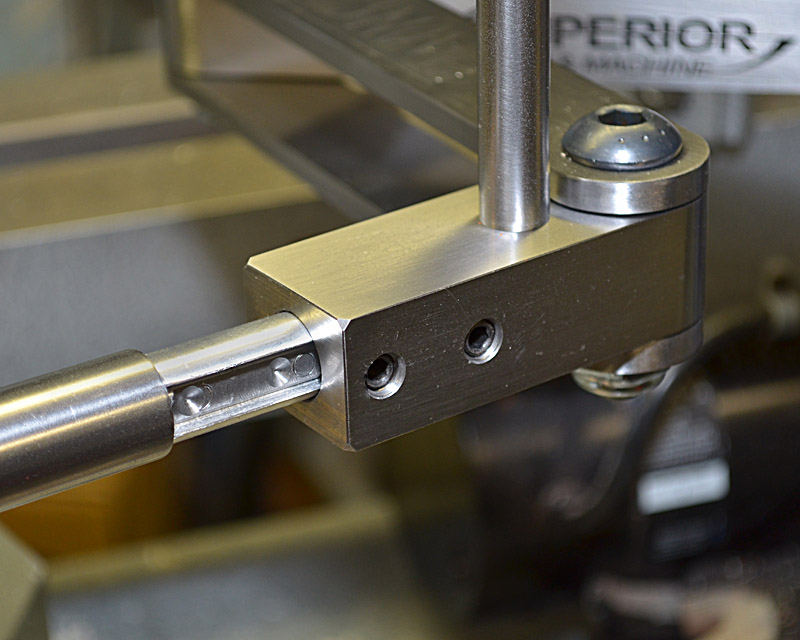
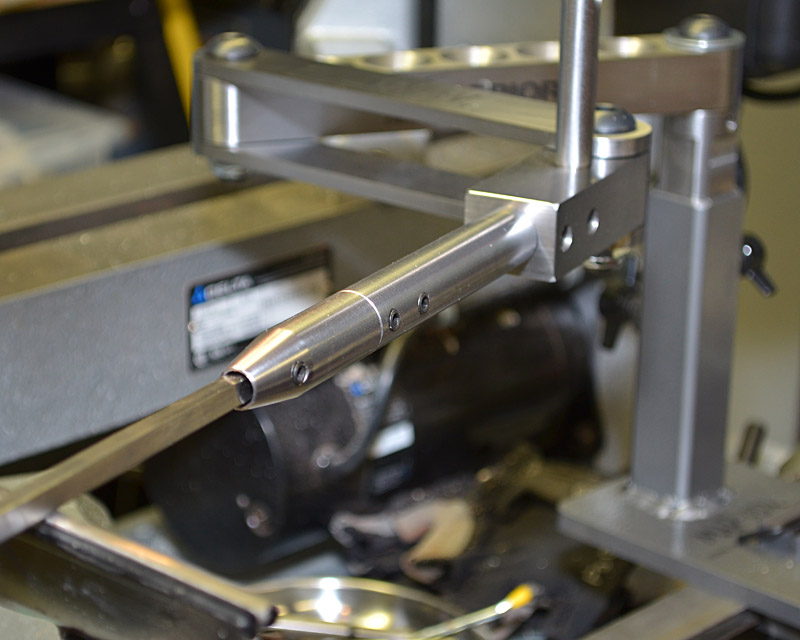
The stock kit ships with a 3/4" x 5.5" extension boring bar that slips into the 3/8" hole at the front end of the 3/4" main bar. The main bar has the back end turned down to fit in the 5/8" hole in the last block on the articulated arm. So to use the extension bar instead of the main bar, all I needed to create was a spacer/bushing that made up the difference in the diameters, and leave a slot for the fastening screws, so they can snug up the rod. So I got to use some of my metalworking toys. I took a short piece of 5/8" aluminum rod to my mini-metal lathe and drilled a 3/8" hole down the center, then parted it off to 1.5" long. Next stop was the mini-milling machine to cut the slot with an end mill. Finally, a little filing to soften the sharp edges left by the milling. Of course, this could have all been done with a drill press and a hacksaw, but those toys aren't nearly as much fun. Slip the finished spacer over the end of any of the pieces that normally go into the end of the main boring bar, and insert into the block... tighten the screws and you're done. I used a slot instead of two oversize holes to make it easier to position the slot relative to the screws, and this also will let me use a thin piece of keystock if I decide that I don't want the screws digging into the metal of the inserts. The stock monster inserts have countersunk areas that correspond to the smaller screws on the boring bar. The larger screws on the block are spaced a little differently. I don't think it matters at all, but tweaking is tweaking. The photos show the spacer and how it's used with a combination of the extension bar and a tip. Also shown is using just the tip (I have no idea if this is at all useful, but hey, I'm playing). So, I don't know if this is solving a problem that doesn't really exists. However, this simple piece of metal allows me to attach any 3/8" item into the block. So the new toy has a new toy. I hope others find this useful, or at least entertaining. |
|
All text and photographs copyright © 1999 - 2017 Zenreich Systems. All rights reserved. |