![]()
![]()
![]()
![]()
![]()
![]()
![]()
![]()
![]()
![]()
![]()
![]()
![]()
![]()
|
|
|
|
Drip Slidin' Away....The photos and instructions below describe the design and fabrication of a sliding drip pan for our #7 Kamado cooker. Click on any photograph for a larger image.
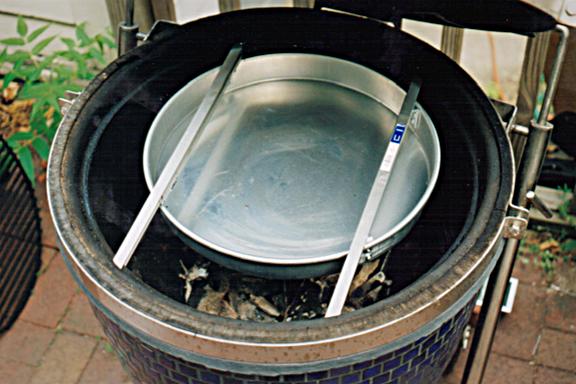
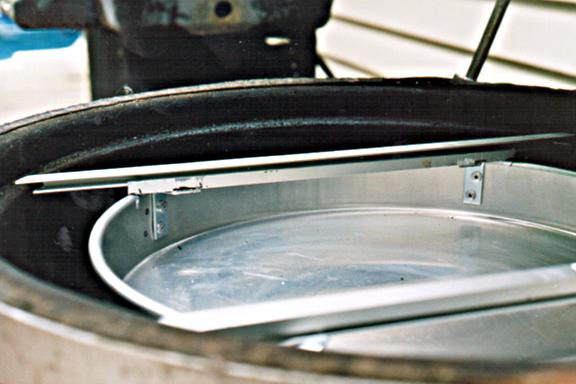
Sliding drip pan, centered, rear and front positions
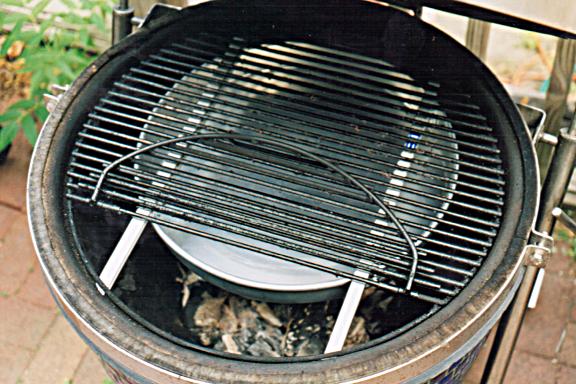
Drip pan, with grill in place; 3 piece assembly; side view
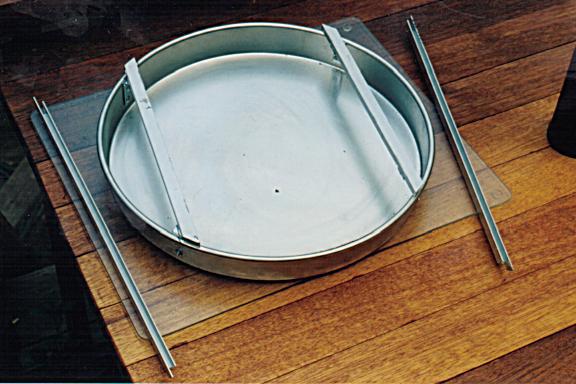
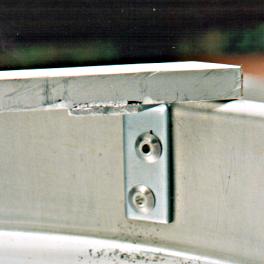
Fabrication detail photos Design goalsI read the messages about other folks’ drip pan designs and while they looked pretty good, all seemed to make getting at the coals a bit difficult. My goal was to jump that particular hurdle. After giving the problem a bit of thought, I got the material I need to fabricate this new design. I wanted a drip pan with the following features:
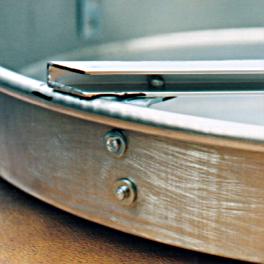
FabricationThe pan itself is a 16” aluminum deep dish pizza pan. Two short “U” shaped pan rails are affixed to the pan with 1” angle brackets. The rail and brackets are all fastened with 3/16” short pop-rivets. The rails are 1/4” “U” shaped aluminum channels available at most hardware stores. Two longer “U” shaped rails are placed into each of the pan rails and the entire assembly is lowered onto the grill ledge. The short rails hang from the long rails. There is enough clearance so that the pop-rivets that fasten the right angle brackets to the bottom of the short rails don’t touch the bottom of the long rail. Note that the long “U” rails are notched at each end so that there is minimal thickness between the grill and the grill ledge. The ends of the long rails are tapered, and the pan rides on the inside of the long rails, so there is no possibility of the rails separating, as they are captured by the ledge circumference. I experimented with the amount of expansion that might take place when the aluminum is heated, but so far I've not had any problems with buckling of the channel rods from an overly tight fit. Then again, I tend to use the drip pan with modest temperatures, under 400 degrees F. When pushed to the rearmost position, there is about 4” of access which is enough for me to see and mess with the coals. I’m considering adding an 18” pan to the options, I’d just need to attach some sort rails to the larger pan and use the same long rails. This would be for when no coal tending is called for. The materials costs were $9 pan, two 48” U channels @$4.79 each. Package of 4 1” angle brackets $2.50 and some short pop-rivets and washers ~$3.00 , for a total of about $25. The actual fabrication time was about 1 hour with simple tools (handheld electric drill, center punch, jigsaw, metal file and hacksaw.) So, why go through this extra work when there really isn’t much fire tending needed? For me, fussing with the coal and wood chunks is
half the fun of cooking with wood on the Kamado… then again, I fuss with the
knobs on my Ducane grill too!
Copyright © 1999 by Zenreich Systems. All rights reserved. |
|
All text and photographs copyright © 1999 - 2017 Zenreich Systems. All rights reserved. |