![]()
![]()
![]()
![]()
![]()
![]()
![]()
![]()
![]()
![]()
![]()
![]()
![]()
![]()
|
|
|
|
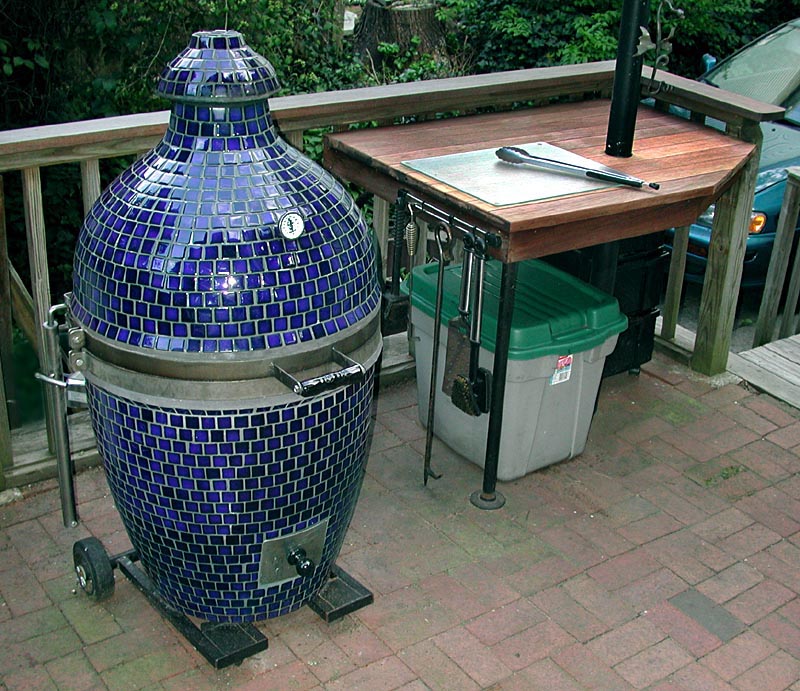
Kamado Work TableShortly after we got our #7 Kamado, it was time to rework a section of our patio to accommodate it. This mainly involved making a worktable to use as a staging area during cooking. I wanted a place to hang my tools (fireplace poker, grill cleaner, spatula, etc.), as well as storage for lump charcoal and chunks of wood. One little engineering challenge is that there is a post for our patio light cemented into the brick floor, right where I wanted to put a table. Undaunted, I decided to build the table around the post. I considered many table surfaces including tiling the table to match the Kamado, but I thought the "K" should stand unchallenged. I finally settled on using 5/4" tongue and groove mahogany on a frame made of pressure treated 2x2" lumber. The front leg is black iron pipe. It took the better part of a day to build the table, because I was making it up as I went along. Click on the small photos for a larger image.
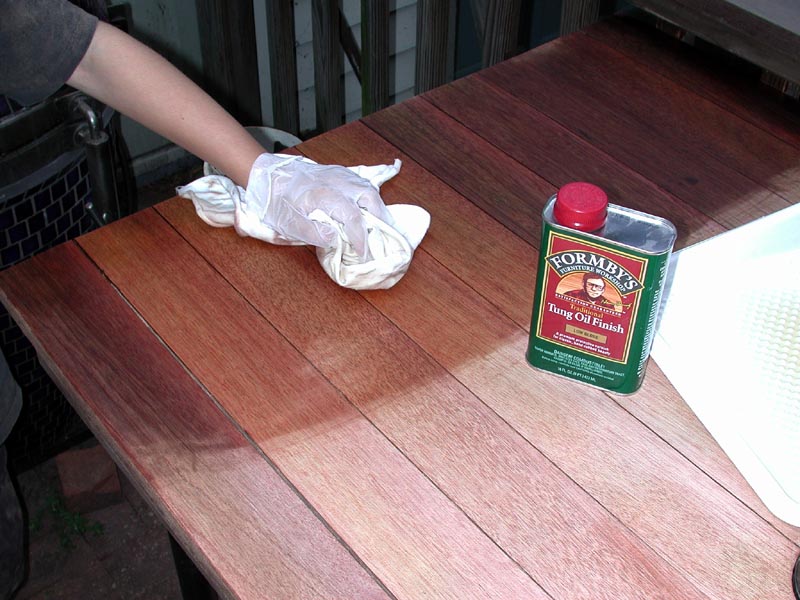
I finished the table using Tung oil, instead of using varnish or polyurethane. I'm not sure if this was a mistake, but I like the look of the oiled wood. There was a lot of variation of tone in the tongue and grooved wood, and the oil brings out the detail nicely. This has to be weighed against the fact that this is not fine furniture, it's a table that lives outdoors all year round. Last year I gave it a couple of preliminary coats of tung oil, but between hurricane Floyd and a very icy winter, the elements took its toll on the table's finish. So I decided to sand the table and re-oil it.
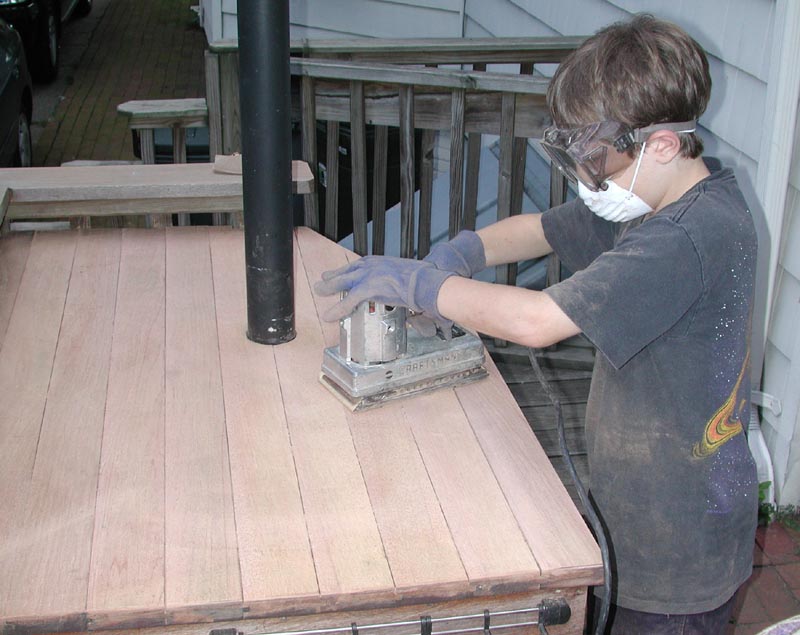
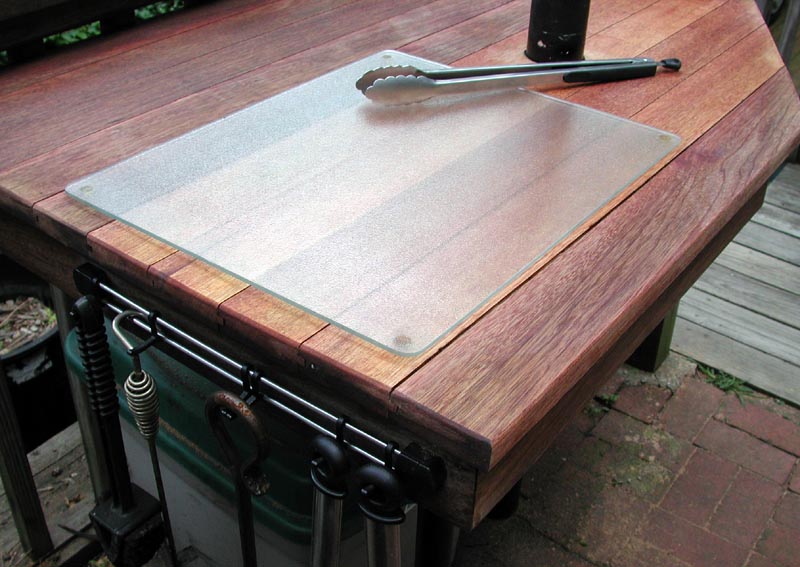
I keep a piece of tempered glass on the table, as it's easy to keep clean. However you can see that the area covered by the glass didn't weather as much as the rest of the table. and it was time for a general cleanup. I took a belt sander and made a couple of passes with 50 grit and 80 grit belts. I then turned it over to Joshua who got his first try at handling a power tool, in this case an orbital sander.
He sanded using 80, 100 and 150 grit papers, and had to do quite a bit of hand sanding in the areas under the rail caps, where the sander couldn't reach. This was a good opportunity to reinforce lessons about safety... he wore gloves, eye protection, and a dust mask. Joshua was pretty pleased at the way the sanded table looked. However he didn't really realize how much of a difference the oil would make to the finish. So I let him apply the oil (in this case a low luster finish) with a lint-free cloth. I think he was quite surprised at how quickly the grain came through.
We'll give the table several more coats over the next couple of days.
The table makes it very convenient for us to cook on the Kamado. We have a cabinet that stands to the left of the cooker where we keep things like firebricks, gloves, fire starters, and miscellaneous other items. The arrangement is pretty comfortable, but I still need to get better lighting onto the grill surface for cooking at night. If you have comments, please drop by our Guestbook.
Copyright © 2000 by Zenreich Systems. All rights reserved. |
|
All text and photographs copyright © 1999 - 2017 Zenreich Systems. All rights reserved. |